
OSS-Strapi
Implementing an Image Hosting Service and Static Resource Upload Based on Strapi
- [√] Drag and Drop Upload
- [√] Image Preview
- [√] Delete Resources
- [√] Upload Progress
- [√] Copy to Clipboard
- [√] Ctrl + V Paste Upload
Introduction to Strapi
Strapi is an open-source Node.js content management framework that helps developers quickly build APIs without worrying about database configuration, data model definition, CRUD operations, and more.
I noticed that its documentation includes an Upload plugin, which helps manage media resources. By leveraging Strapi's REST API, we can use it to implement a simple image hosting service.
Installation and Configuration of Strapi
Installation
# Install Strapi
npx create-strapi-app@latest my-img-bed --quickstart
Start the project:
# Enter the project directory
cd my-img-bed

# Install dependencies
npm install

# Start the project
npm run develop
Requesting a Token
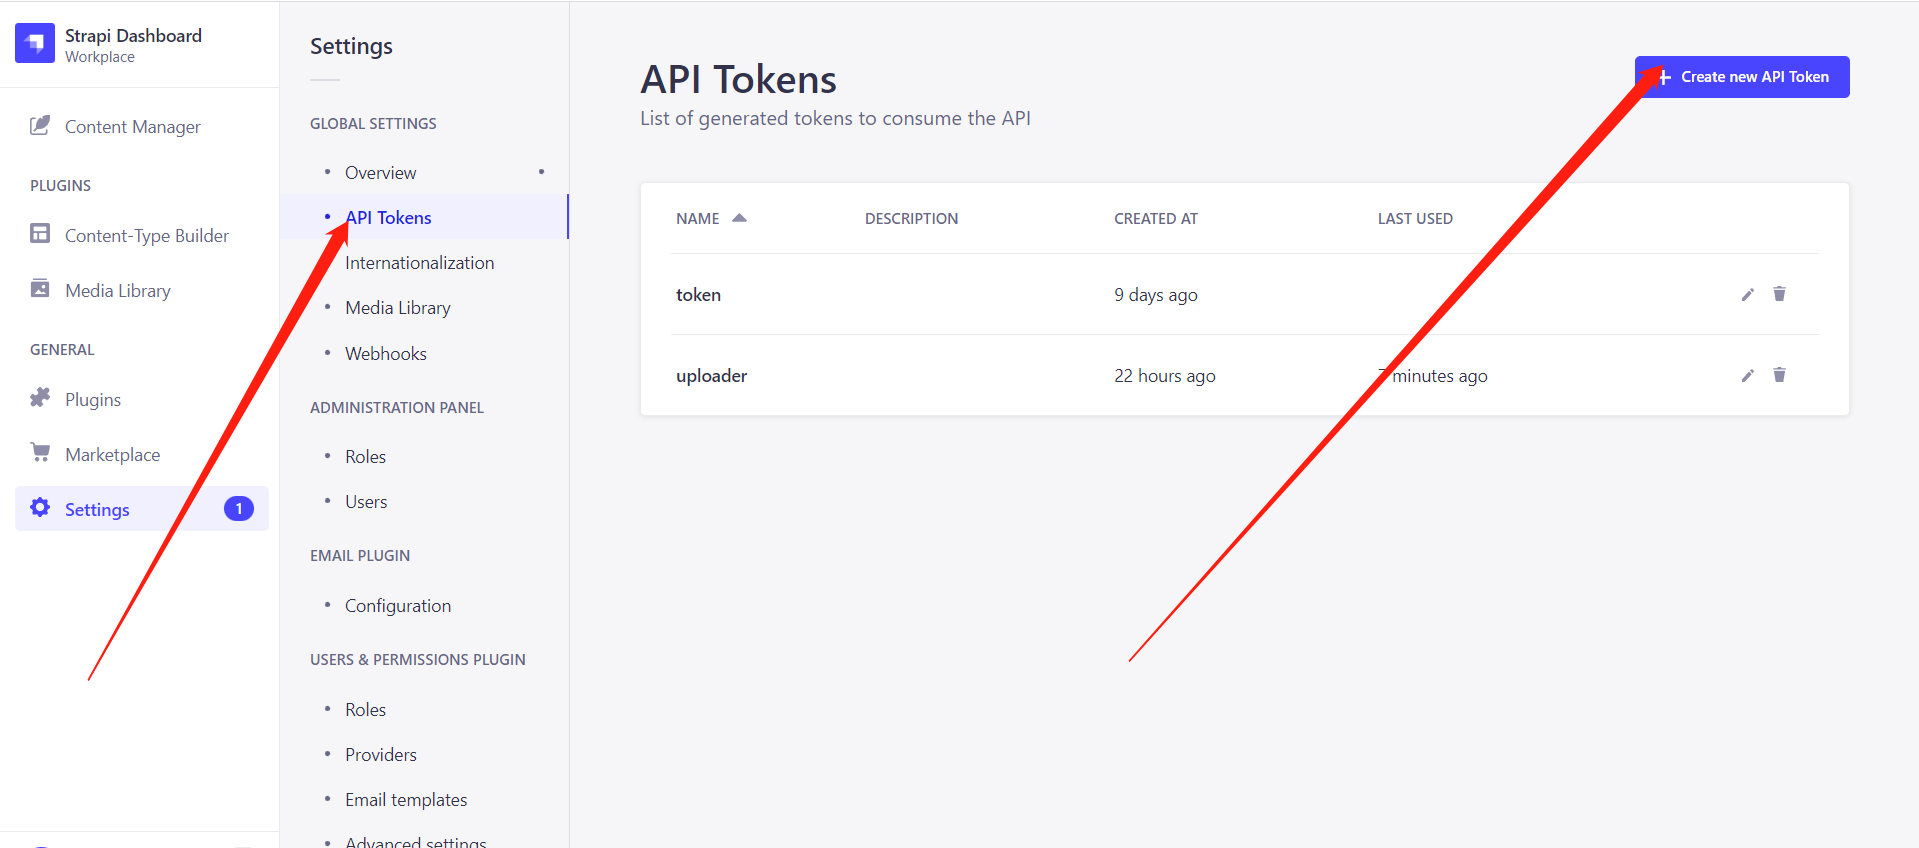
In the Strapi admin panel, click Settings on the left, then click API Token, click Create Token in the upper right corner, enter the token name, click Save, and then copy the token. Note: The token will only be displayed once. If you forget it, you can create a new one.
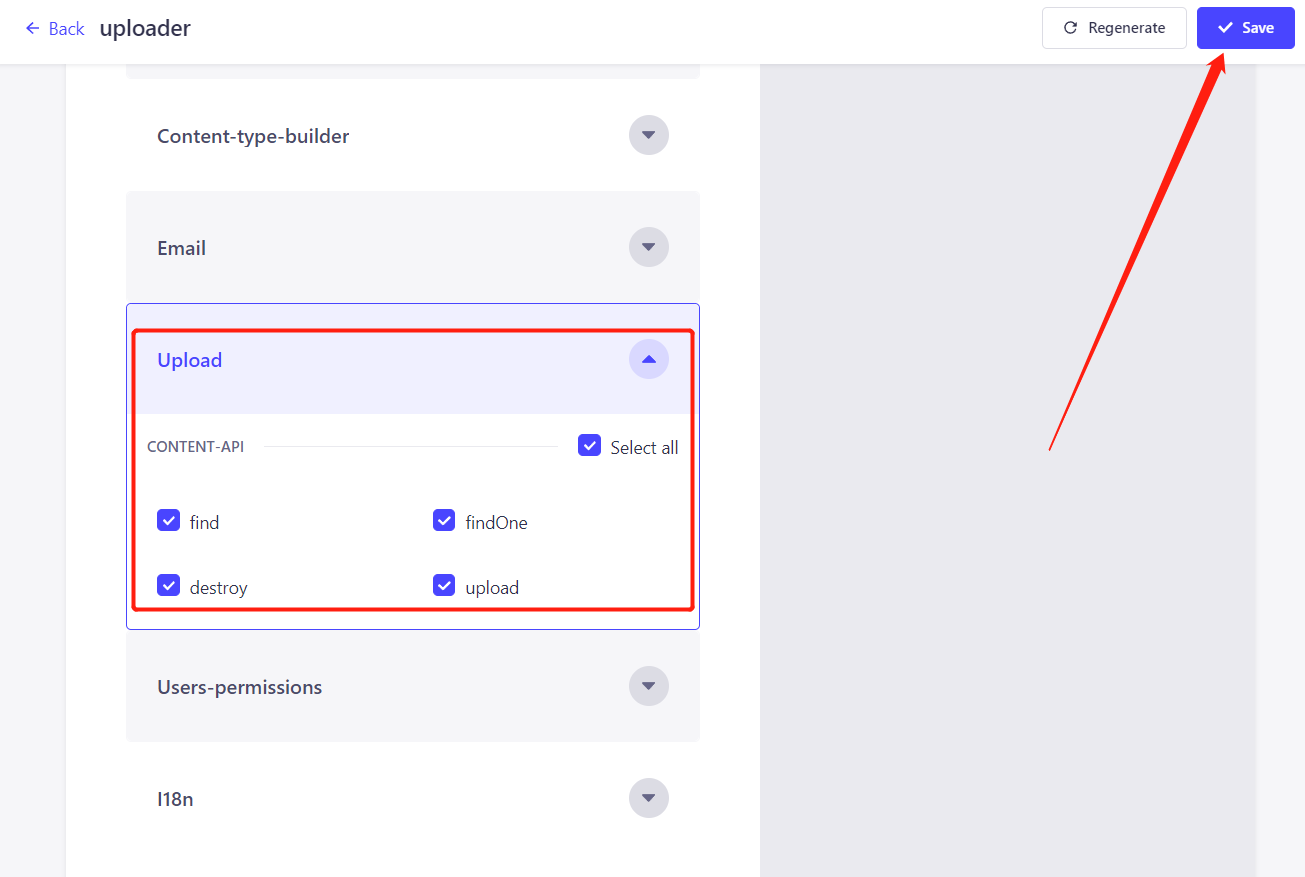
Enable token upload permissions below:
Deploying to a Server
You need to deploy your Strapi to your server to enable the image hosting feature. Deployment is straightforward and requires the following steps:
- Install pm2
- Install nginx
- Configure nginx
- Configure pm2 and start the Strapi project
Assuming your Strapi is deployed at http://yourdomain.com, your API prefix will be http://yourdomain.com, which will be used in the following configurations.
OSS-Strapi
There are two ways to use OSS-Strapi: you can clone it to your server and run it, or you can directly access my deployed site oss-strapi. All APIs and tokens are stored locally in the browser and will not be uploaded to my server, so you can use it with confidence.
After entering oss-strapi, click Settings in the upper right corner, enter your Strapi address in API Prefix, and enter your token in Token. Click Save to start using it.
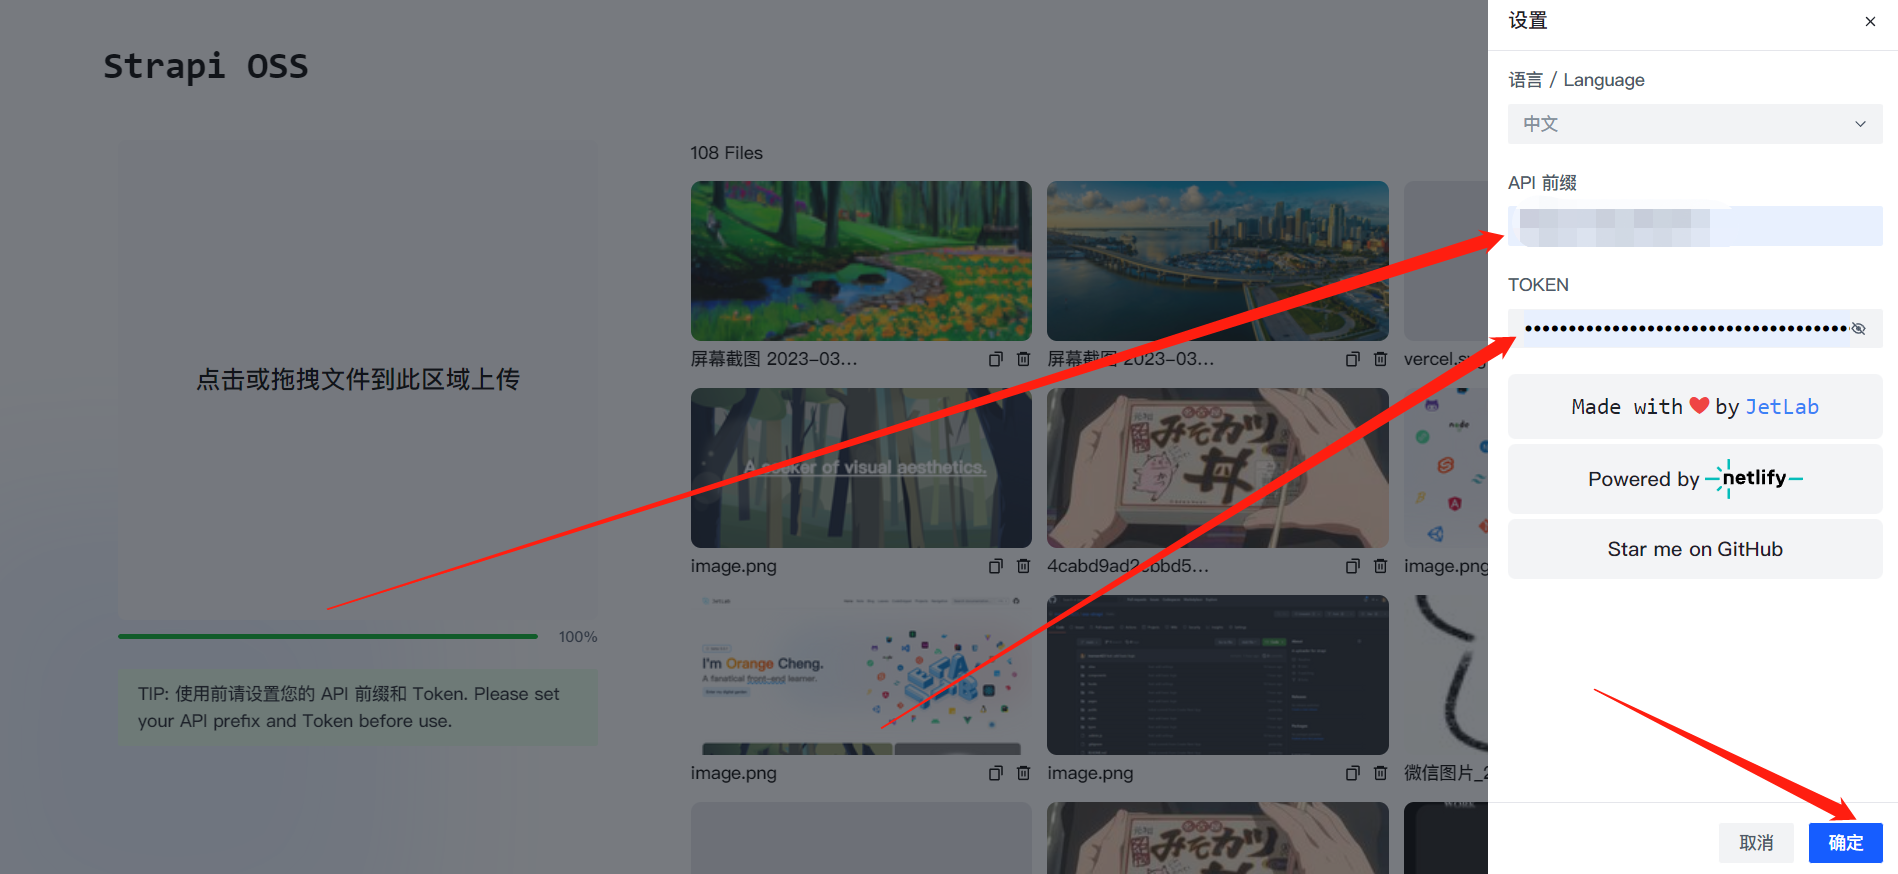
You can upload, delete, copy, and perform other operations in the interface.
If you find this helpful, please consider giving it a Star. Thank you!
OSS-Strapi介绍
基于 Strapi 实现图床、静态资源上传
- [√] 拖拽上传
- [√] 图片预览
- [√] 删除资源
- [√] 上传进度
- [√] 复制到剪贴板
- [√] Ctrl + V 粘贴上传
Strapi 介绍
Strapi 是一个开源的 Node.js 内容管理框架,它可以帮助开发者快速搭建 API,而不需要关心数据库的配置、数据模型的定义、数据的增删改查等操作。
我注意到它的文档中有一个 Upload plugin 插件,它可以帮助我们实现媒体资源的管理,同时借助 Strapi 的 REST API,我们可以利用它实现一个简单的图床。
Strapi 安装和配置
安装
# 安装 Strapi
npx create-strapi-app@latest my-img-bed --quickstart
启动:
# 进入项目目录
cd my-img-bed

# 安装依赖
npm install

# 启动项目
npm run develop
申请 Token
在 Strapi 后台管理页面,点击左侧的 Settings,然后点击 API Token,点击右上角的 Create Token,输入 Token 名称,点击 Save,然后复制 Token。注意:Token 只会显示一次,如果忘记了,可以重新创建。
在下方开启 Token 上传权限:
部署到服务器
你需要将你的 Strapi 部署到你的服务器,这样才能开通图床功能。部署的方式非常简单,只需要下面几个步骤:
- 安装 pm2
- 安装 nginx
- 配置 nginx
- 配置 pm2,启动 Strapi 项目
假设你部署后,Strapi 的地址是:http://yourdomain.com,那么你的 API 前缀就是:http://yourdomain.com, 这将在后面的配置中使用。
OSS-Strapi
有两种方式可以使用 OSS-Strapi,你可以将其克隆到你的服务器并运行,也可以直接访问我部署好的站点 oss-strapi。所有的API、Token都以本地缓存的方式存在浏览器中,并不会上传到我这里,所以你可以放心使用。
进入 oss-strapi 后,点击右上角的 Settings,在 API Prefix 中输入你的 Strapi 地址,在 Token 中输入你的 Token,点击 Save,就可以开始使用了。
你可以在界面中进行上传、删除、复制等操作。
如果对你有帮助,欢迎 Star 一下,谢谢!